Updates: The procedure for Part 4 below is used as an example in the DNA digestion & electrophoresis tutorial. A mobile version of Part 4 is available, linking to a video of Case It v705 running the procedure described below. Part 4 below covers the key experiment as described by Jennifer Doudna beginning at 6:00 minutes into this video.
Goal of this exercise: Use Case It v7.0.4 to recreate and analyze experiments that first demonstrated the function of Cas9, an enzyme that plays a fundamental role in CRISPR applications such as gene editing. The experiments described are from Jinek et al. 2012 and its Supplement, organized into four parts. Part 4 covers an experiment to determine whether Cas9 can recognize multiple sites on the same plasmid, by targeting Green Fluorescent Protein (GFP) gene sequences. An answer key for this exercise is available to instructors upon request (contact mark.s.bergland@uwrf.edu).
Part 1: Experiments on site-specific actions of Cas9
Part 2: Experiments with mutations to determine Cas9 gene function
Part 3: PAM requirements and the sensitivity of Cas9 to mismatch
Part 4: Experiments targeting GFP gene sequences
Organization of Part 4
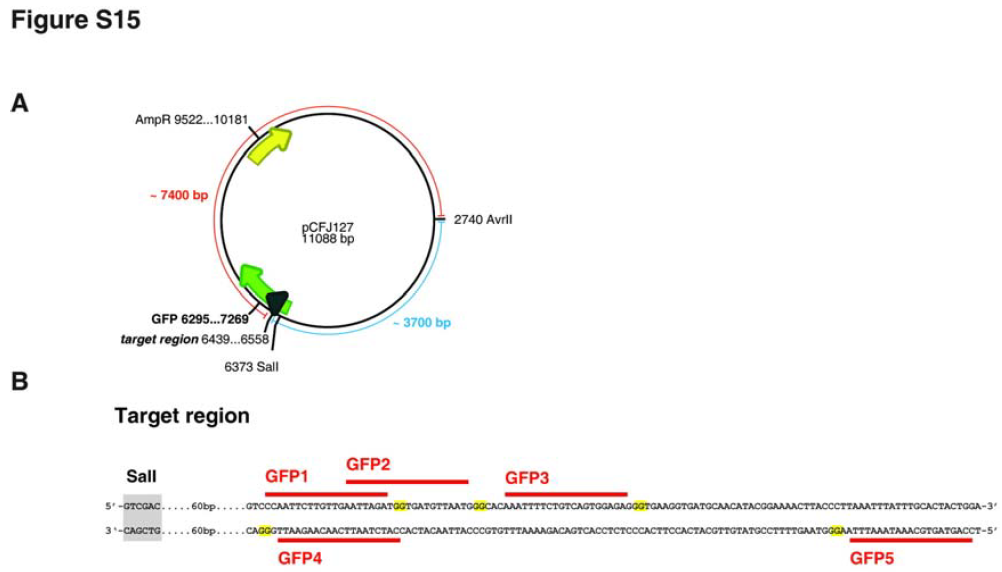
Steps 1-15: Experiment with Cas9 using different GFP sequences on the same plasmid, to recreate Fig. S15 of Jinek et al. 2012.
Step 16: Re-run the above using AvrII rather than SalI, to recreate Fig. 5 of Jinek et al. 2012.
Steps below include links to images of the Case It simulation. If images do not appear sharp, use the Control (or Command) keys in conjunction with the plus and minus keys to change image size. Informational notes and questions are included in blue and yellow boxes, with text in italics.
Case It v7.0.4 is required for this exercise, as earlier versions of the software do not have the features necessary to recreate these CRISPR experiments. Go through Part 1 before attempting Parts 2, 3 or 4 of the exercise, especially if you are unfamiliar with the basic operation of Case It software.
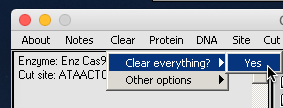
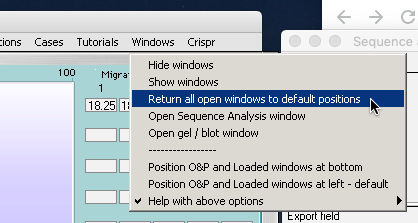
1. Set the program back to its default conditions:
–Click the Clear menu at the top of the data screen and select ‘Clear everything => Yes‘.
–Use the Windows menu to return windows to their default positions.
–Return the silver button bar to its middle position.
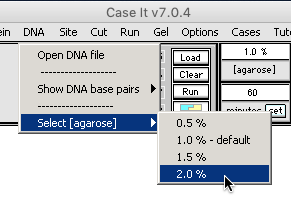
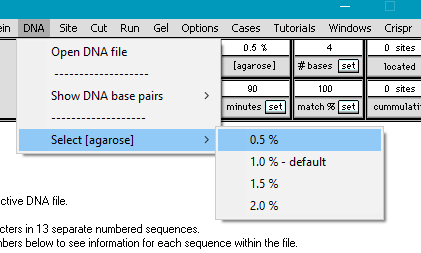
2. Use the DNA menu to change the agarose concentration to 2.0 %.
The goal of the remaining steps is to determine whether Cas9 can recognize and cut multiple sites on the same plasmid, by targeting Green Fluorescent Protein (GFP) gene sequences. This will provide a more rigorous test of the hypothesis that Cas9 can be used as a programmable restriction enzyme, and as such is the single most important experiment described in Jinek et al. 2012.
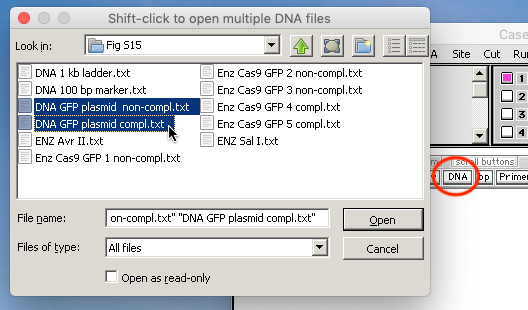
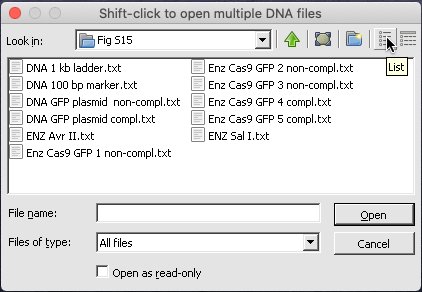
3. Use the DNA button to open the files DNA GFP plasmid non-compl.txt and DNA GFP plasmid compl.txt that are located inside the folder CRISPR data => Fig S15.
Note: If the the arrangement of files within the folder does not match that of the linked image in Step 3 above, click the List view button in the upper right-hand corner of the dialog box.
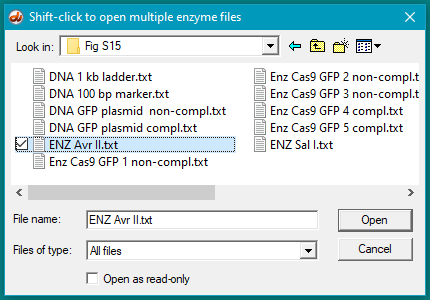
4. Use the Enzyme button and shift-click to open the five ‘Enz Cas9 GFP‘ files .
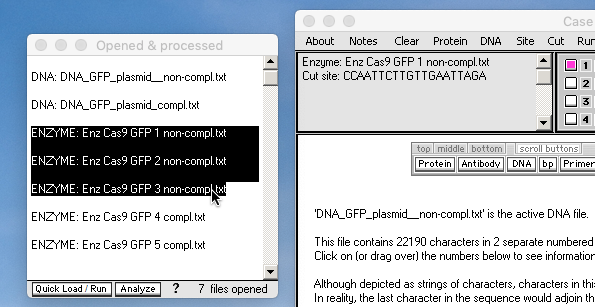
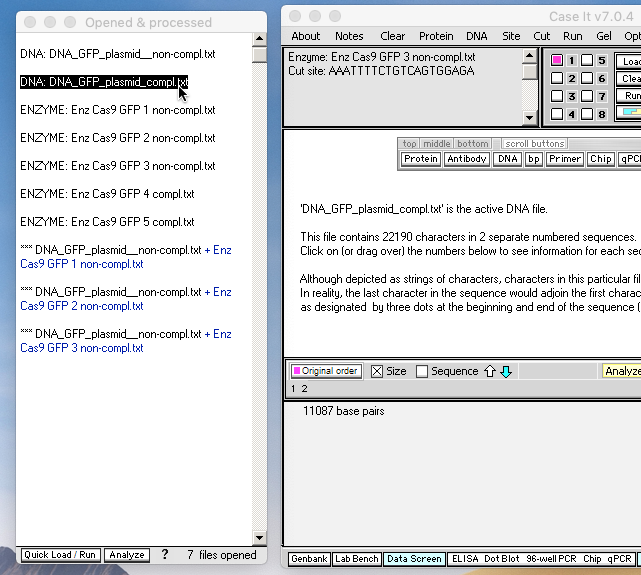
5. Activate the non-complementary plasmid DNA sequence by clicking that line in the Opened & processed (O&P) window.
Note: DNA GFP plasmid non-compl.txt and DNA GFP plasmid compl.txt contain the sites GFP1, GFP2, GFP3, GFP4 and GFP5 as illustrated in Fig S15 of the Supplement to Jinek et al. 2012. Note that GFP1, GFP2, and GFP3 are on the non-complementary side of the plasmid DNA, whereas GFP4 and GFP5 are on the complementary side. Thus, the two files represent the same plasmid sequence, with the the second being the reverse complement of the first. This arrangement enables the Case It simulation to read both files in the 5′ to 3′ direction. The overall size, GFP sites, and SalI site of these sequences were constructed to match Fig S15, but other aspects of the plasmid are artificial as the actual sequence is not available at the Addgene repository. This will not impact the results of the analysis.
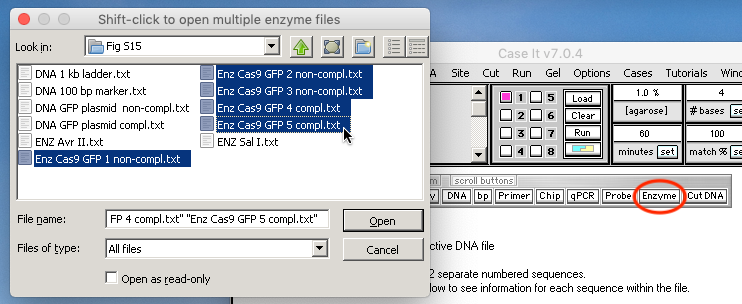
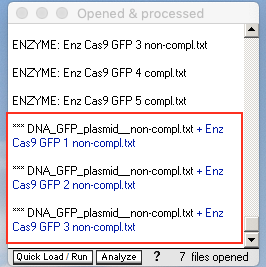
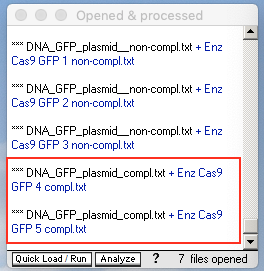
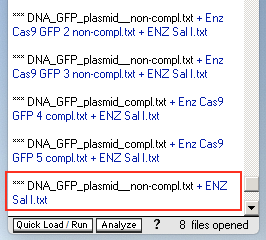
6. Shift-click to select the Cas9 enzymes for GFP1, GFP2, and GFP3. (Be careful not to select GFP4 or GFP5 at this point in the procedure).
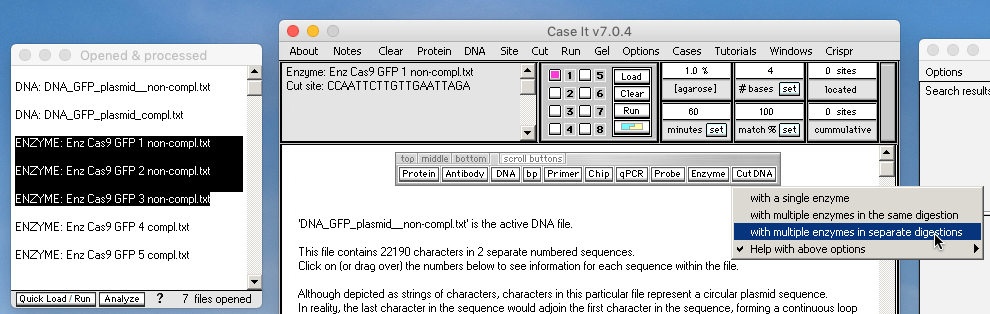
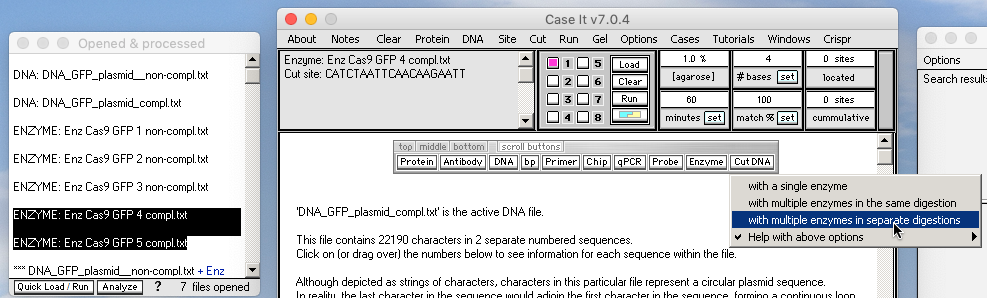
7. Use the Cut DNA button and select ‘with multiple enzymes in separate digestions‘ from the drop-down menu. Three new lines will appear in the O&P window, with ‘***’ prefixes indicating that they represent digested DNA files.
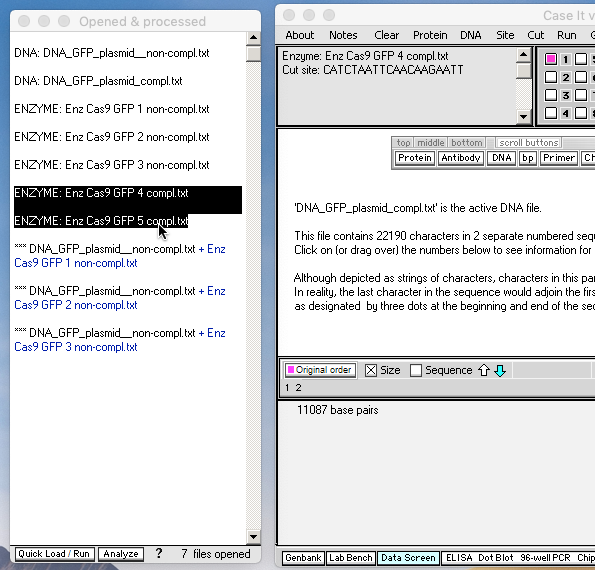
8. Expand the size of the O&P window (by dragging the lower edge downwards), then activate the complementary plasmid DNA sequence by clicking that line in the O&P window.
9. Shift-click to select the Cas9 enzymes for GFP4 and GFP5.
10. Use the Cut DNA button and select ‘with multiple enzymes in separate digestions‘ from the drop-down menu. Two new lines will appear in the O&P window, with ‘***’ prefixes indicating that they represent digested DNA files.
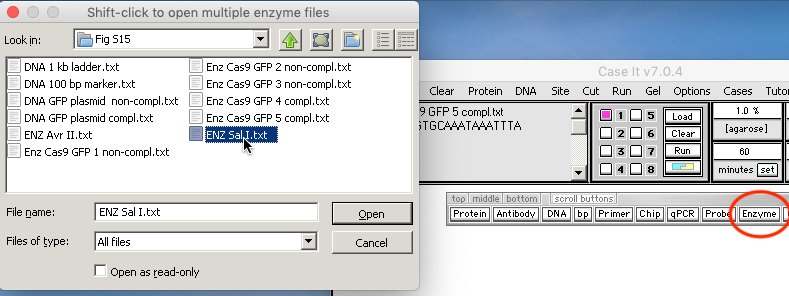
11. Use the Enzyme button to open and activate the restriction enzyme SalI.
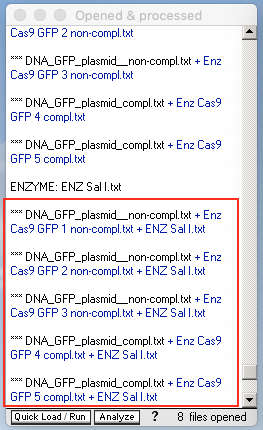
12. Shift-click to select the five lines with ‘***’ prefixes, then use the Cut DNA button and select ‘with a single enzyme‘ from the drop-down menu. Five new lines with ‘***’ prefixes will appear, representing the five double-digested samples.
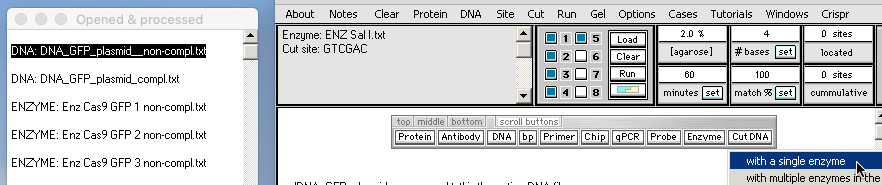
13. Scroll up to the top of the O&P window and select the file ‘DNA_GFP_plasmid_non-compl.txt‘, then click the Cut DNA button and select ‘with a single enzyme‘ from the drop-down menu. A new line with a ‘***’ prefix appears, representing the non-complementary plasmid DNA sequence digested by SalI.
14. Use the DNA button to open the 100 kb marker file.txt (not the ‘1 kb ladder’ file which is in the same folder).
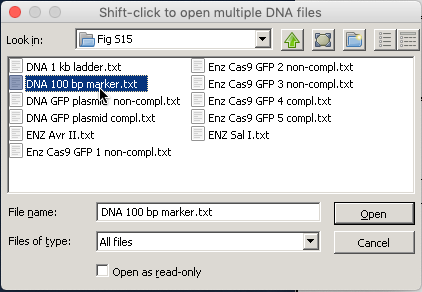
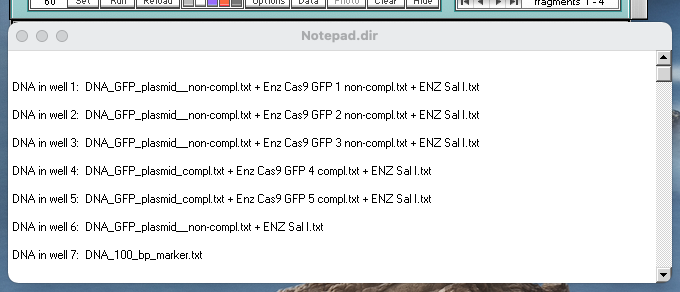
15. Shift click to select the seven lines at the bottom of the O&P window (representing the five double-digested plasmid files, the plasmid file digested only by SalI, and the 1 kb marker file). Then click the Quick Load / Run button and select ‘DNA gel => Load well[s] & run gel in one step => Stain DNA fragments purple‘.
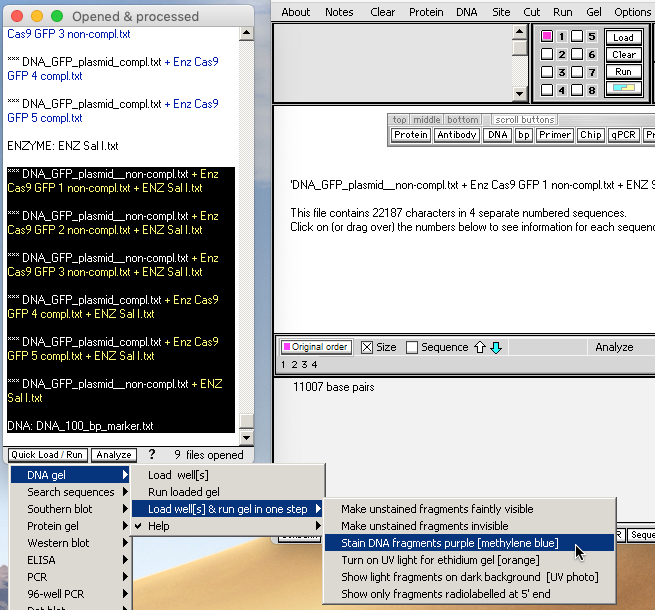
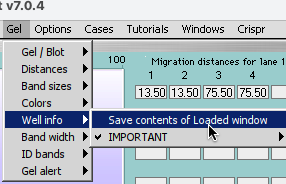
Note: Move the Loaded window to the left of the gel, drag the lower edge to show all of the information for the seven loaded wells, make a screenshot of the Loaded window and gel, then and save it. Or, you can use the Gel menu to transfer the contents of the Loaded window to the Note Pad, and take a screen shot of the gel and Note Pad. You can also save or copy the contents of the Note Pad. See note under Step 15 of Part 1 for more information.
Your loaded window should look like this (resized by dragging the left and bottom edges). Analyze your gel and answer the questions below.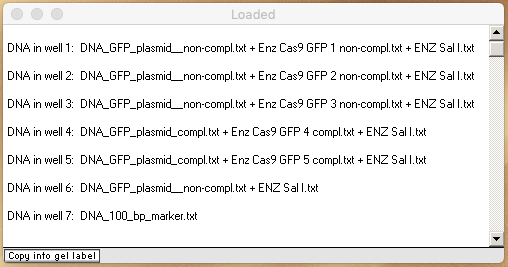
Questions:
A: Do your results support the hypothesized function of Cas9 as a programmable DNA-cutting enzyme? Why or why not?
B: One could argue that your virtual gel and Fig S15 summarize one of the more important experimental results in biological history. Do you agree or disagree with this? Justify your answer.
C. Revisit your answer to B above after watching this video, starting at the 6:00 mark. Why does Jennifer Doudna refer to results of the experiment in Fig S15 as their “aha moment”?
16. Re-run steps 1-15 to recreate the gel in Fig. 5 of Jinek et al. 2012 (in the main article, not the supplement). Make the following changes in the procedure:
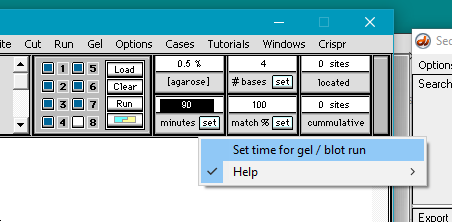
Step 2 above: Change the agarose concentration to 0.5, and change the timer setting to 90 (by double-clicking in the field and typing ’90’, then clicking the Set button and selecting ‘set time for gel/blot run’).
Step 11 above: Use the restriction enzyme AvrII instead of SalI. The file ENZ AvrII.txt is located in the same folder as ENZ SalI.txt.
Questions:
A. Look at the plasmid diagram in Fig S15, and locate the AvrII cut site on that diagram. Why do fragments in the lanes of the gel with AvrII have less separation than the fragments in the lanes of the gel with SalI?
B. Click on the fragments in the lanes of the AvrII gel to determine their sizes (fragment size appears at the bottom of the Data Screen). Do the sizes of the fragments in the AvrII gel support the conclusion that Cas9 is a programmable restriction enzyme?
C. If you could only use the SalI gel or the AvrII gel to illustrate the nature of Cas9, which would you use, and why?
Top of this page
Go back to Part 1: Experiments on site-specific actions of Cas9
Go back to Part 2: Experiments with mutations to determine Cas9 gene function
Go back to Part 3: PAM requirements and the sensitivity of Cas9 to mismatch