INTRODUCTION TO THE CASE IT SIMULATION
It is best to begin by learning the steps of PCR, restriction enzyme digestion and DNA electrophoresis, as these are basic procedures used in a variety of cases. One way to learn these procedures is via the video tutorial entitled ‘PCR, digest DNA and run gels on the Data Screen‘, also linked in the table below. This tutorial was created using an earlier version of the simulation, but is suitable for use with Case It v7.0.4 or v7.0.5 as the interface is similar. (Ignore any comments in videos about using the ‘photo’ feature of Case It to capture images of gels, blots, etc. That feature is no longer supported, so you will need to capture images using screenshots.)
Going through Part 1 of the CRISPR exercise is another way to learn the steps of restriction enzyme digestion and DNA electrophoresis, using both plasmid DNA and oligonucleotides. This exercise includes detailed instructions and screen shots (click here and here for examples).
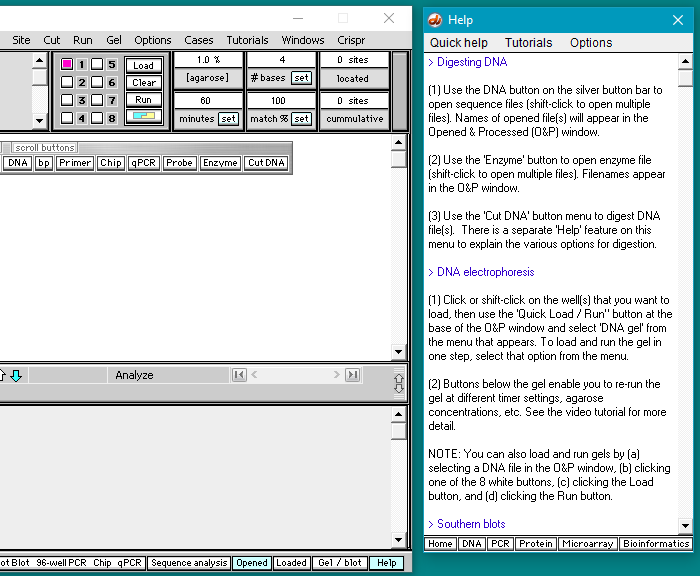
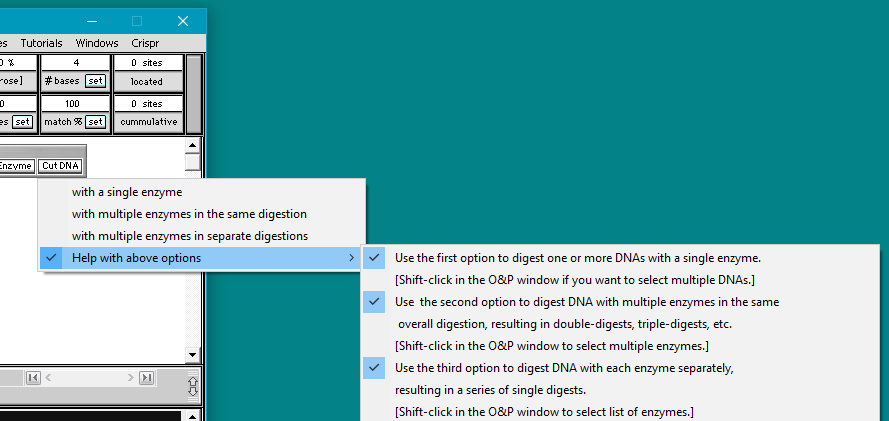
Step-by-step instructions can also be found in the Help window of Case It v704 or v705, and some menu items include Help entries.
Troubleshooting: if you run into any issues with the software not working properly (files or folders appear to be empty, error message on startup), simply moving the Case It folder to your desktop will fix the problem. In general, avoid nesting the Case It folder or the Case It Mac app inside other folders, and leave the Case It executable file (Case It v7.0.4.exe or Case It v7.0.5.exe) inside the Case It folder.
Use the Search box below to see selected results (e.g., try typing ‘video’ or ‘PCR’ in the box).
TUTORIALS FOR CASE ANALYSIS AND RESEARCH APPLICATIONS
| Tutorial name | Media | Description |
|---|---|---|
| Cytokine ELISA and flow cytometry | Web page | Procedures described in body of mRNA vaccine exercise |
| Plasmid and oligonucleotide electrophoresis | Web page | Procedures described in body of CRISPR exercise |
| Notes on program use and terminology | ||
| Sequence alignment, tree-building, and BLAST | PDF, Powerpoint | PDF / Powerpoint tutorial covering BLAST and three different methods of sequence alignment and tree-building, using case scenarios as examples. |
| Sequence alignment and tree-building via MEGA software | Video | Video tutorial on how to align sequences and build trees quickly, using included MEGA bioinformatics software. Includes information on how to interpret trees. |
| Quantitative PCR (qPCR) | Video, PDF, Powerpoint | How to run qPCR simulation using honey bee case as an example. |
| Searching sequences | PDF, Powerpoint | Tutorial demonstrating sequence searching feature using color vision research project as an example. |
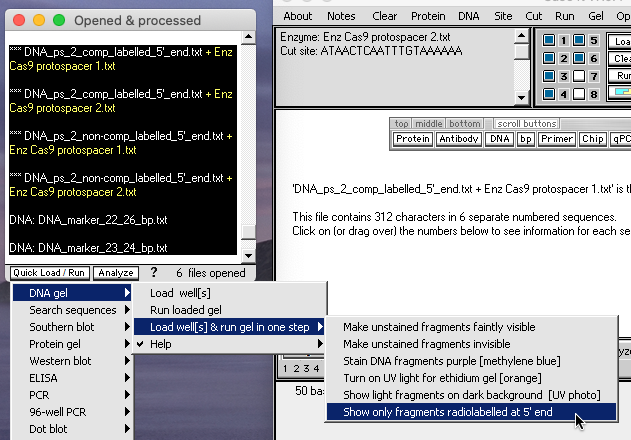
| PCR, restriction enzyme digestion and DNA electrophoresis (on the Data Screen) | Video | Restriction enzyme digestion of PCR products, using the Cystic Fibrosis case as an example. See Introduction to Case It software in the box above for other ways to learn these procedures. |
| Show forward and reverse primer sites for PCR | Video | Shows forward and reverse primer sites on any DNA sequence, followed by an animation of the first step of the PCR procedure. |
| 96-well PCR | Web page | Running PCR in a 96-well plate to determine viral load for infectious disease cases such as SARS, HIV and influenza. |
| ELISA and Western blot | Video | Demonstrates auto-loading features to quickly load protein and antibody samples, using one of the HIV cases as an example. |
| Dot blot (autoload) | Video | Open and load DNA and probe files quickly, using the Breast Cancer case as an example. |
| Southern blot (autoload) | Video | Select DNA and probe samples and run Southern blot, using the Huntington’s Disease case as an example. |
| Differential display feature | Video | Demonstrates the Differential Display feature used to visually determine the relative amount of DNA in a given band, in Southern blots and gels. |
| Lab Bench – a virtual laboratory for restriction enzyme digestion and DNA electrophoresis | Video | Simulated equipment can be used to carry out restriction enzyme digestion and DNA electrophoresis, on the ‘Lab Bench’ screen. Although this works with any non-plasmid DNA sequence, it is much faster to use the Data Screen for these procedures. |
| Quick start instructions for running microarrays | Web page | To get up and running quickly with SNP and expression microarrays |
| SNP microarray | Video | Background information, loading and running SNP microarray cases, connecting to online databases, calculations for genotype calling. |
How to make screenshots of gels and other images:
Older versions of the Case It simulation had a ‘photo’ feature enabling users to take photos of gels and other images. This feature is no longer supported, so it is necessary to use other screen capture applications, such as those that come with the Windows and Mac operating systems. Snipping Tool (and the newer Snip & Sketch) allows you to capture portions of your screen on Windows computers. Open one of these applications, click ‘New’, and drag the screen to capture an image. The image can then be saved in various formats, although .png is preferred.
For the Mac, one way to capture the screen is to use the Preview application. Open Preview, then select ‘Take Screenshot’ from the File menu. There are three options: From Selection, From Window, and From Entire Screen. The first option is the easiest way to capture an image. The image can then be saved as a .png file. The Screenshot app (formerly Grab) can also be used to capture the screen.