Searching sequences using Case It v6
Case It v6 has enhanced features for searching DNA and protein sequences, involving the new 'Sequence analysis' window. This tutorial describes some but not all of the functionality of that window, using a Huntington's disease example. Specifically, we will search for the triplet repeat CAG which is associated with this disease condition.
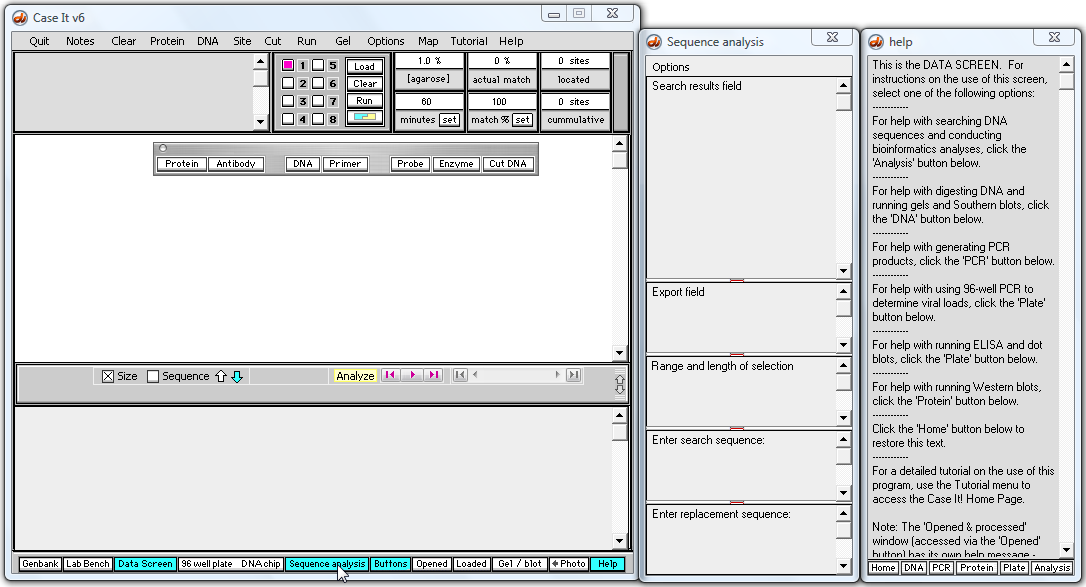
1. Use the navigation bar at the bottom of the Data Screen to open the Sequence Analysis (SA) window.
![]()
2. The Sequence Analysis (SA) window appears to the right of the Data Screen, and the Help window is automatically displaced to the right when the SA window opens.
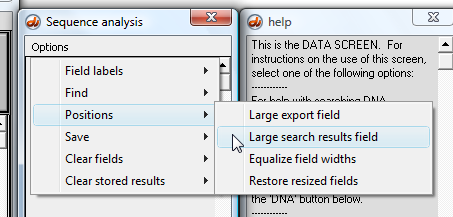
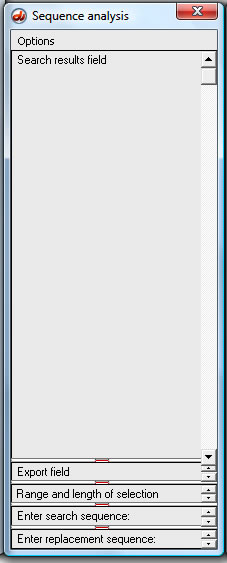
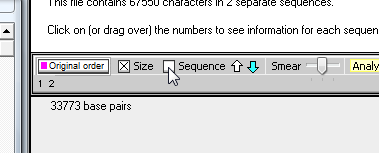
2a. Use the 'Options' menu of the SA window and select 'Large search results field', which automatically makes this field larger and the others smaller.
| Note: These fields can also be resized using the red drag handles in the middle of each divider bar - we won't demonstrate this here. |
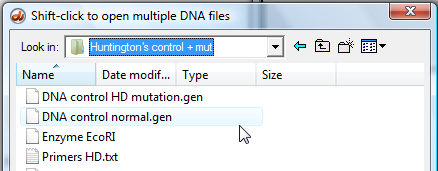
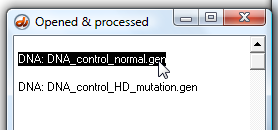
3. Click the DNA button on the silver button bar of the Data Screen, and open the following folders: Case It v6 - > Tutorials -> 'Huntington's control + mut' folder
Open the 'DNA control normal.gen' file which is inside the 'Huntington's control + mut' folder.
![]()
4. Note that the name of the file appears in the Opened & processed (O&P) window to the left, and information regarding this sequence appears in the main window (the 'Data Screen').
First click the 'Sequence' checkbox on the gray divider bar...
...then use your mouse to highlight the words 'Enter search sequence' in the field towards the bottom of the SA window.
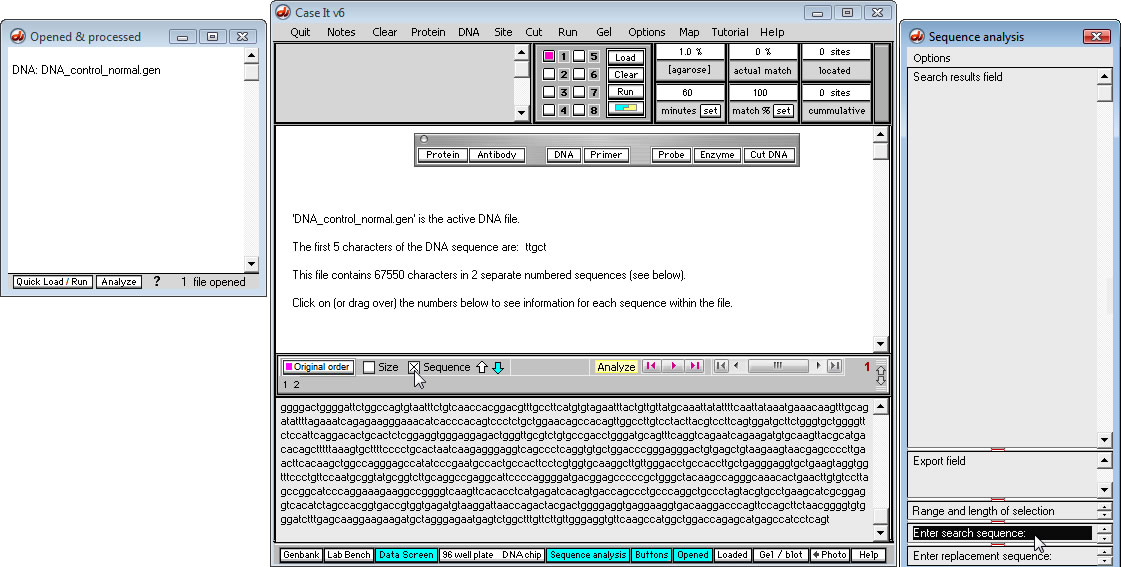
5. After highlighting the words 'Enter search sequence', type 'cagcagcagcag' into this field.
Note: Multiple repeats of the triplet 'cag' are associated with the Huntington's Disease condition, so we want to search for the first series of repeats. We are currently working with the normal sequence, so there will be some repeats even with the normal condition. |

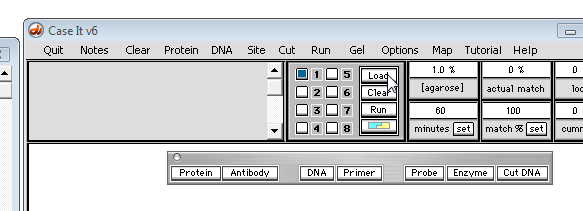
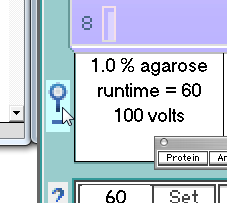
6. Before searching a sequence, a well must be loaded which contains that sequence, so click the 'Load' button on the Data Screen.
| Note: Loading must precede searching even if you do not intend to run a gel - it is just the way the program works. |
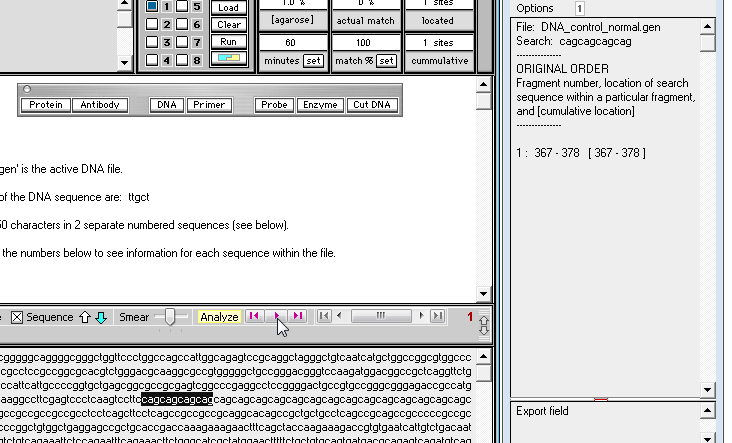
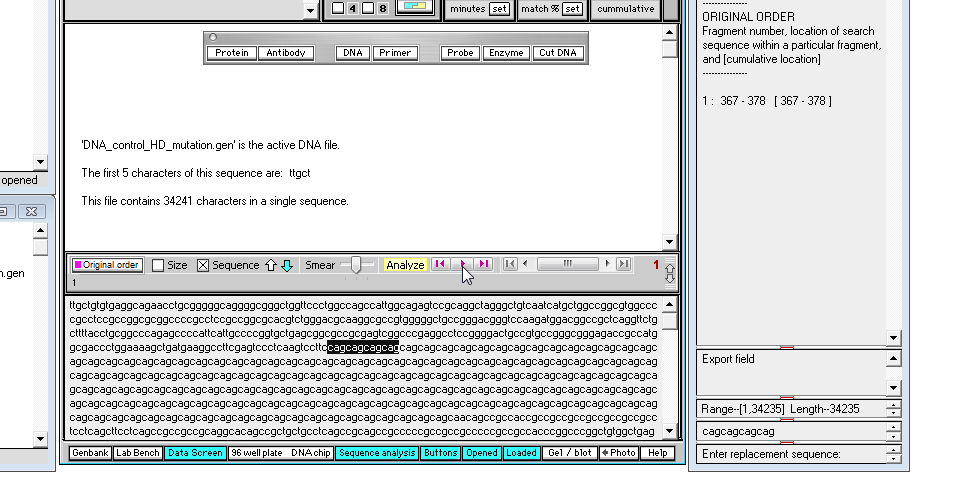
7. To search for the first occurrence of the 'cagcagcagcag' triplet sequence, click the middle purple arrow button on the gray divider bar, and note that the first occurrence is highlighted, and the numerical location appears in the 'Search results' field of the SA window (that is, the first character of 'cagcagcagcag' is at location 367 from the beginning of the sequence, and the last character is at location 378).
8. By eye, drag with your mouse and highlight all of the 'cag' repeats that occur in the normal sequence, as shown below. The length of the highlight sequence changes as you drag with your mouse, and when the entire 'cag' repeat sequence is highlighted the total length is 54 characters (as shown in the Range / length field of the SA window - see below right).
| Note: Fifty-four divided by 3 is 18, so there are 18 'cag' triplets in this normal sequence. |

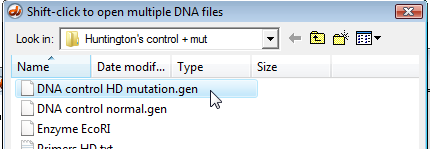
9. We will now determine the number of repeats in the mutated sequence, so click the 'DNA' button on the silver button bar and open 'DNA control HD mutation.gen'.
![]()
10. Click the 'Sequence' check box to see the sequence itself (rather than the size of the sequence, which you see by default).

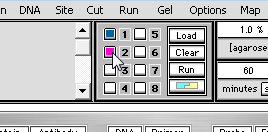
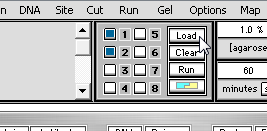
11. Recall that to do a search, a sequence must first be loaded in a well, so select well #2 (below left), then click the Load button (below right).
 |
 |
12. Click the middle purple arrow button as shown below to find the fist occurrence of 'cagcagcagcag' in the mutated sequence.
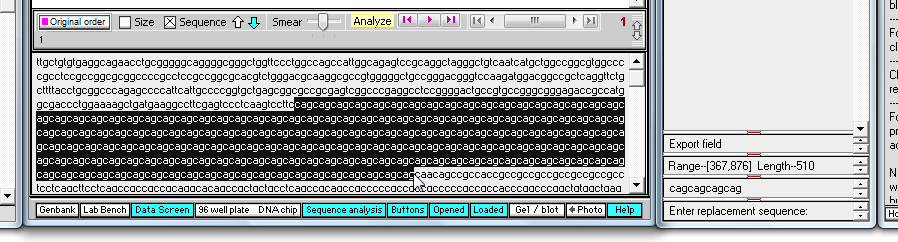
13. By eye, drag with your mouse to highlight the entire series of 'cag' repeats in the mutated sequence, and not that the total length is 510 characters (as shown in the 'Range' field near the bottom of the SA window).
| Note: 510 divided by 3 is 170, so there are 170 'cag' triplets in this mutated sequence. Having more than 50 repeats of the 'cag' triplet is usually associated with the symptoms of Huntington's disease. |
14. Next, we will demonstrate how to search multiple fragments simultaneously, using Huntington's sequences that have been digested with a restriction enzyme to create multiple fragments.
Before going any further, clear the wells by using the menu choices below. Note that this way of clearing leaves the contents of the O&P window intact.

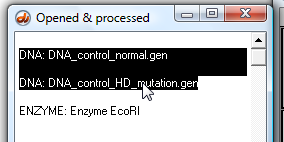
15. Activate the 'normal' sequence in the Opened & processed (O&P) window by clicking the line associated with it.
16. Click the 'Sequence' check box to show the actual sequence rather than its size.
17. By eye, highlight the exact characters shown below (middle of the fourth line from the beginning of the sequence).
Note that we are highlighting part of the 'upstream' sequence before the repeats, and some but not all of the repeats.

18. Use the yellow 'Analyze' menu and make the menu selections shown below.
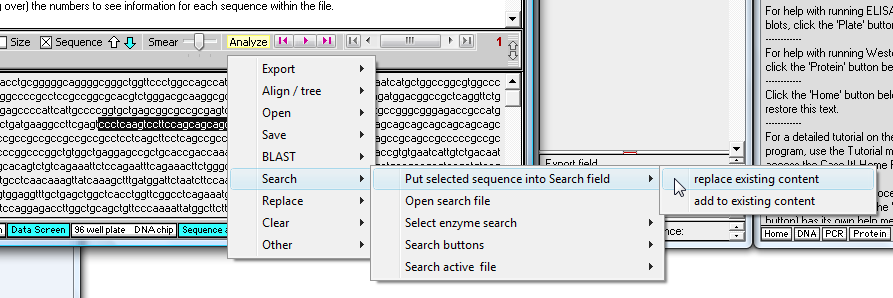
19. The highlighted characters appear in the 'Enter search sequence' field. To see all of them, you would have to manually resize the fields (optional).
| Note: Start resizing by dragging the red drag handle above the 'Export field' upwards, then drag the handle above the 'Range and length of selection' field upward, and finally drag the handle above the search characters upwards (this last step is what is shown below). |

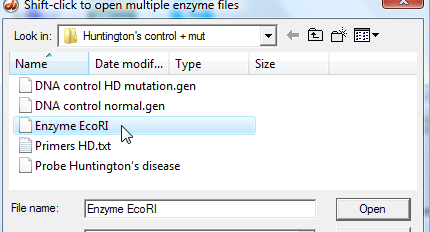
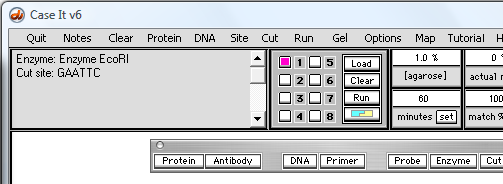
20. Click the 'Enzyme button and select 'Enzyme EcoRI', and the enzyme recognition sequence will appear in the upper left-hand field of the Data Screen (third graphic below).
| Note: There are several other ways of selecting this particular enzyme, such as using the Site menu at the top of the screen. |

21. Use the 'shift-click' technique to highlight the two DNA sequences (click the first line, hold down the shift key, and click the second line).
22. Click the 'Cut DNA' button on the silver button bar.
![]()
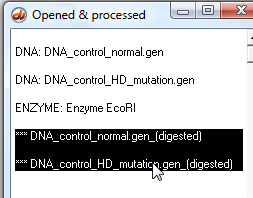
23. Shift-click the two new lines in the O&P window, which represent the two digested sequences.
24. Click the 'Quick Load / Run' button and make the menu selections shown below.
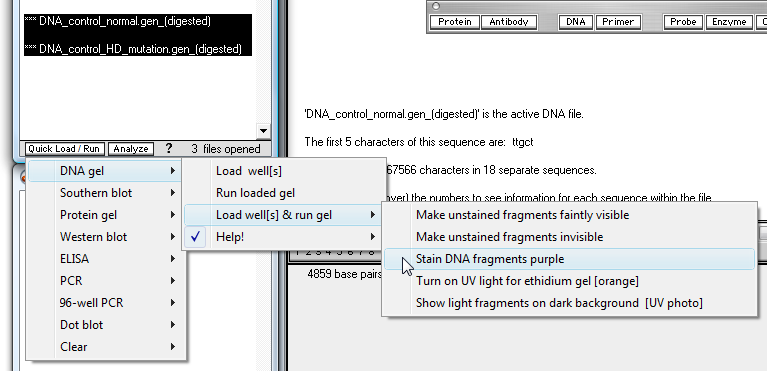
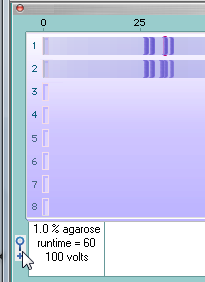
25. The gel will be run and appears in a separate window floating above the Data Screen.
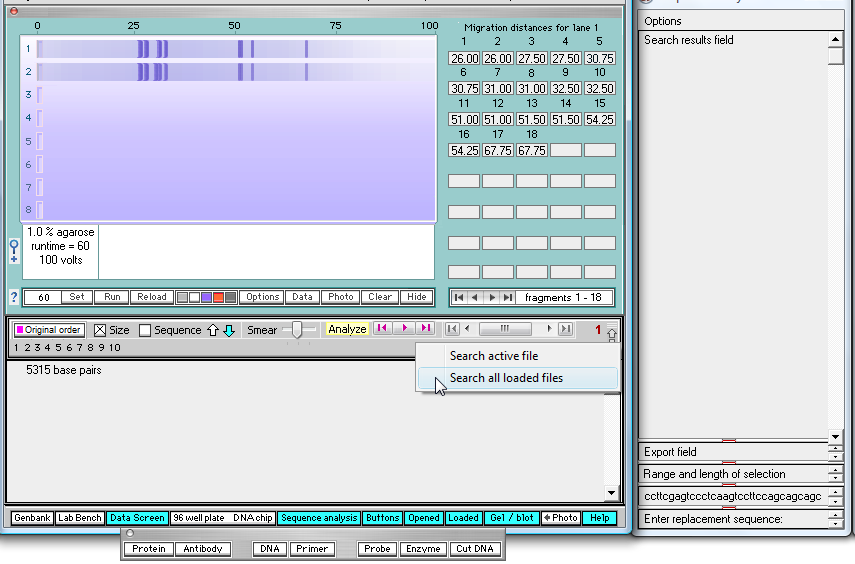
Click the rightmost purple search button, and select 'Search all loaded files' as shown below.
| Note: Be sure to click the purple search button on the right, not the middle button. |
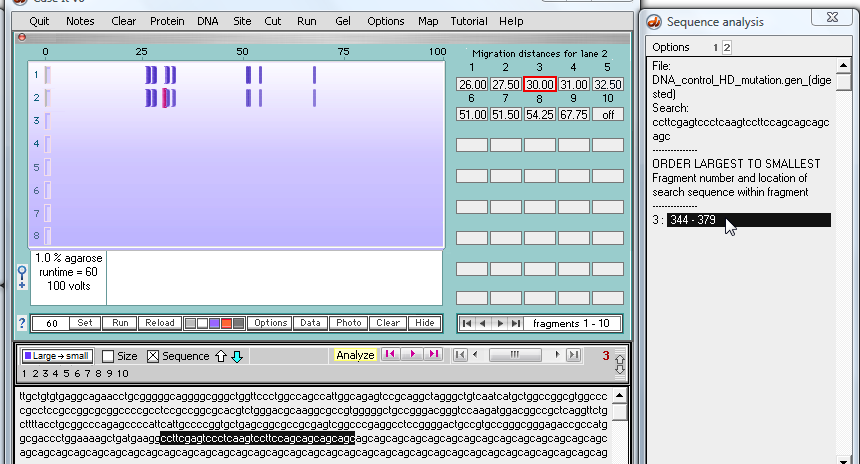
26. All fragments in both lanes will be searched for the target sequence, with the results appearing in the SA window. The box around the number '2' at the top of the SA window indicates that the results shown are for the file associated with the second well (the mutated sequence).
Click the line representing the line in the SA window as indicated below, and note that the location of the target sequence is indicated in the field at the bottom of the Data Screen. In addition, the fragment containing the sequence turns red, and a red box appears around the box that shows how far this particular fragment has traveled (30 relative units).
Note: Although not demonstrated here, you could use the 'Data' button below the gel to change distances to sizes in the boxes to the right of the gel. Note: You can also click on the individual fragments to see size and sequence, and can also BLAST the fragment sequence to see if other genes have this type of repeat- click here for a tutorial. |
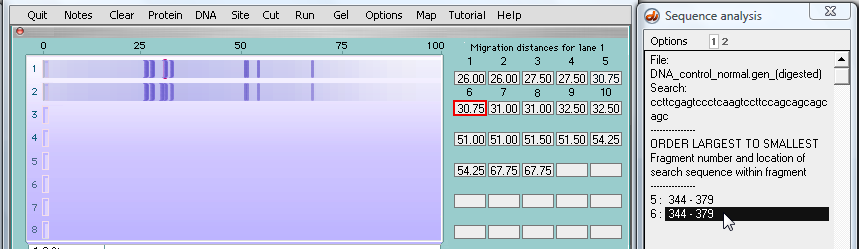
27. To see the hits on the normal sequence in well #1, locate the '1' at the top of the SA window and click it...
28. ...and search results appear for the normal sequence in the first well.
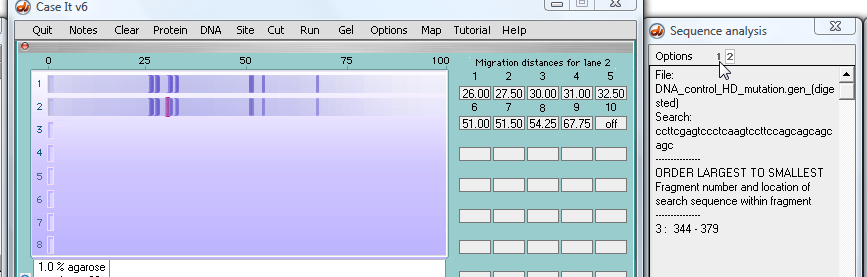
Next, click one of the two lines in the SA window, and the associated fragment turns red (although this is hard to see because the red fragment is underneath two other fragments - we'll address this problem in the next step). Note that this fragment has traveled 30.75 units, as indicated by the box with the red outline below.
| Note: The normal fragment in the top lane traveled further (30.75) than the fragment from the mutated sequence (30) because the normal fragment has fewer repeats of the 'cage' sequence. |
29. To make the red fragment easier to see, magnify the gel by clicking the magnifying glass icon as shown below.
30. The red fragment is still obscured, but is easier to see.

31. Return the gel to its normal size by clicking the magnifying glass icon again.
| Note: The gel will automatically return to its normal size whenever it is moved by dragging the silver region at the top of the gel. |
This concludes this tutorial.